| |
Mastering
3D Studio MAX R3 |
CHAPTER 15
Creating A User Interface
Featuring
- • Designing Utilities and UI Items
- • Building Alert Messages
- • Building Rollouts and Floaters
- • Making Scenes Interactive
- • Building Shortcut Menus
No scripts we have done so far look like any sample
script that comes with MAX. This is because these scripts have a user
interface. This interface makes the script look like a MAX command, dialog
box, or any MAX interface item.
Using a user interface (UI) allows us to make our scripts easier to use
and understand, and more intuitive also. Let’s learn how to implement
it, and enhance the scripts we have done so far.
Designing Utilities
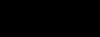
The simplest script that has an interface is the utility. Utilities will
appear as new rollouts in the MAXScript area of the Utility tab, as seen
in Figure 15.1.
To run any utility, simply choose Run Script and select a Utility Script
file. It’ll appear in the drop-down list. When you select it, MAX
will start the script and add a rollout under the MAXScript rollout. All
options from this script can be found in this new rollout. An example
of a utility is the Custom Icon Maker sample script that comes with MAX.
FIGURE
15.1 MAXScript area in the Command Panel
Creating a
Utility
The utility is very similar to a Macro Script, but it has a defined space
for an interface. When we need an interface in a Macro Script, we need
to use floaters, which we’ll see later in this chapter.
Let’s create a utility as an example. You will need to use interface
items, such as buttons or spinners, to make this script work. Start a
new script and write:
utility example “Utility Example”
(
)
This is the format of a utility. It requires a variable name and a text
name, which will be displayed in the Utilities drop-down list. It also
requires parentheses that define where the utility starts and ends.
Using File Ø Evaluate, evaluate this
script and notice it appears in the list of utilities. Select it from
the list and it becomes a rollout, as shown in the following graphic.
As you see, it has nothing but the Close button. All utility rollouts
have a Close button at the end.
Buttons
Let’s start adding content to this script. The first UI item we’ll
learn is the button. When a button is pressed, it performs a specific
action or set of actions. To add a button to our script, add this line
inside the brackets:
button go “Start”
Now evaluate your script and notice that, with no more code than this,
we already have a button.
Now that we have a button in the script, click it. Did anything happen?
Of course nothing happened, because we didn’t add any command to
this script. Let’s do so. Here’s the whole script:
utility example “Utility Example”
(
button go “Start”
on go pressed do
(
pt = pickpoint()
c = cylinder pos:pt radius:15 height:60 heightsegs:15
)
)
Now the button has a series of actions to perform when the button is
pressed. The syntax is simple: on <button variable name> pressed
do etc.
We can enhance the button appearance by specifying its width, height
and a tooltip. For instance, let’s add a second button that will
bend the cylinder, and let’s adjust the buttons’ appearance
(specifically, their widths and tooltips). Here’s the finished script
again:
utility example “Utility Example”
(
button go “Start” width:120 tooltip:“Start Object Creation”
button bend_it “Bend” width:120 tooltip:“Bend the Object”
on go pressed do
(
pt = pickpoint()
c = cylinder pos:pt radius:15 height:60 heightsegs:15
)
on bend_it pressed do
(
addmodifier c (bend angle:30)
)
)
Evaluate the script and test each button. You will notice we’ve
put both button definitions at the top of the script and both actions
below. There’s no specific requirement for all the buttons to be
defined first; doing so just makes it easier to organize the interface.
Notice also we’ve specified a 30-degree bend directly in the addmodifier
command.
Spinners
Spinners are UI items used to specify values. They’re the same UI
items we use to specify the radius of a cylinder, the size of a box, and
so forth.
Continuing to use our example, let’s add a spinner to control the
bend angle. Listing 15.1 presents the final script.
LISTING 15.1: The Spinner script (utility_bend.ms)
utility example “Utility Example”
(
button go “Start” width:120 tooltip:“Start Object Creation”
button bend_it “Bend” width:120 tooltip:“Bend the Object”
spinner bend_ang “Angle”
on go pressed do
(
pt = pickpoint()
c = cylinder pos:pt radius:15 height:60 heightsegs:15
)
on bend_it pressed do
(
if c != undefined then addmodifier c (bend angle:30)
bend_ang.value = 30
)
on bend_ang changed val do
(
if c != undefined then
for i in 1 to c.modifiers.count do
(
if classof c.modifiers[i] == Bend then
(c.modifiers[i].angle = bend_ang.value exit)
)
)
)
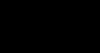
After evaluating the script, you will see the interface with the spinner
added as in Figure 15.2.
FIGURE
15.2 The Utility Example script, with a spinner
This script added a couple of checks before adjusting the bend value.
It needed to check if the Bend modifier was applied to the object. First,
it checks to see if c exists on the scene. After that,
the script scrolls through all modifiers in the object to see if any of
them is a Bend. If so, the angle is modified. Notice we’ve used an
Exit command. It stops the loop, and exits, so the first Bend of the object
will be edited, if there is more than one bend.
We can do similar check to the button, so it also does not apply another
bend to an object if it already has a bend applied. You can see the complete
code of this script on the CD, in the file utility_bend.ms
under the Chapter 15 directory.
Let’s adjust the spinner properties. You noticed that the spinner
goes from 0 to 100. We might want a different range. To choose one, simply
specify:
spinner bend_ang “Angle” range:[-180,180,0]
This will set the spinner range from –180 to 180, with 0 as default.
(If the user right-clicks a spinner, it resets itself to the default value.)
We can set more properties in a spinner. For instance, the spinner values
in this script are float variables. Sometimes we might need integer values.
This can be done using type:#integer or type:#float.
We can also set the stepping of the spinner, defining its precision. This
is done using scale:0.01, for instance. In this case, the
spinner will always step in multiples of 0.01.
Let’s edit our script, adjusting the spinner one more time. Set
the spinner type to float, and also make it snap in multiples of 2.5:
spinner bend_ang “Angle” range:[-180,180,0] type:#float scale:2.5
Evaluate the script and notice the spinner jumps only in values that
are multiples of 2.5. You can enter any value by typing, but using the
mouse will always provide the restricted values.
© 2000, Frol (selection,
edition, publication)
|
)
)
)
)
)