| |
Right-Click
‘til You Drop
Drag-and-dupe is one of many important uses for the second button on
your mouse, track ball, or tablet. In normal use (i.e., not in the middle
of a transformation), pressing Button 2 (or “right-clicking”)
activates a context-sensitive menu of functions and commands. If you have
selected a rectangle, the context menu will be different than if you have
selected a string of text.
Our advice to you is simple: right-click on everything! Corel has done
a pretty good job of providing pop-up menus that include the important
operations connected with each type of object or screen element. Just
don’t try to remember all the details. Instead, right-click on every
possible screen element, every object, tool, and icon, and take note of
the various options that appear.
|

| NOTE When we
give instructions throughout the book, most of the time we’ll
refer you to the traditional methods of invoking commands or clicking
icons, and we’ll let you know when a hotkey is available. You
can take other routes as you like, such as using the context menu,
going to a custom toolbar, or using a script.
|
Step by Step: Spyrograph
Revisited
We’re just starting out with DRAW, yet you already know enough to
work the program and produce a simple piece of art. Try this:
- 1. Click the Ellipse tool in the toolbox and move
out to the page.
- 2. Create an ellipse of any size or shape. Notice
that when you finish drawing the ellipse, the Ellipse tool is still
active, enabling you to continue drawing ellipses.
- 3. Create a second ellipse, this time holding Ctrl
while you drag. The result is a perfect circle.
- 4. Create another ellipse, this time holding Shift.
Shift forces the ellipse to draw from the center out in all directions.
- 5. Create an ellipse while holding both Ctrl and
Shift. The result is a perfect circle drawn from the center out in all
directions. These two keys behave the same for rectangles and polygons.
- 6. Select all objects on the page (Edit Ø
Select All Ø Objects, Ctrl+A,
or double-click the Pick tool) and delete them.
- 7. Now draw one thin ellipse, as shown below.
- 8. Color it blue, or some dark color other than
black (the outline is black and it will look better if the interior
is a different color).
- 9. Change to the Pick tool (use the toolbox or just
press the spacebar), and click once on the ellipse to get the rotation
handles.
- 10. Click on one of the corner rotation handles,
and rotate the ellipse approximately 10 degrees. The property bar above
the page will show you the degree of rotation as you move the handle.
Don’t release Button 1 yet...
- 11. While still holding down Button 1, tap Button
2. That creates a copy, as shown below.

- 12. With the second ellipse still selected, press
Delete to delete it.
- 13. Select the original ellipse, click again for
the rotation handles, and begin rotating again.
- 14. This time, however, press and hold Ctrl while
you rotate. As discussed earlier, this constrains the rotation to 15-degree
increments. You’ll get immediate confirmation of this as the ellipse
snaps from one position to the next (the property bar will also confirm
the constraint).
- 15. While still holding Ctrl and while still holding
Button 1 (this is like an aerobic workout for your hands), tap Button
2 to make a copy.
Take your hand off the mouse for a moment to review (and rest your fingers!).
In steps 12 through 15, you selected an object, began rotating it, constrained
its rotation, and made a copy. DRAW sees all of those things as one maneuver.
That means that it can be repeated easily. Watch:
- 16. Go to Edit Ø
Repeat Rotate (and note its shortcut of Ctrl+R). Suddenly, another
ellipse appears.
- 17. Press Ctrl+R to make another one.
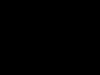
- 18. Keep pressing Ctrl+R as the ellipses make
their way around the pattern. Stop when your screen looks like the one
below.
Now for the pièce de résistance.
- 19. Select all the ellipses, using any of the Select
All commands noted in step 6, or just by drawing a marquee around them.
- 20. Choose Arrange Ø
Combine (or press Ctrl+L).
- 21. Press F4 to get a closer look and press Esc
to remove all selection handles.
- 22. Save your drawing if you would like to keep
it.
Remember the discussion earlier about how Combine turns many objects
into one and cuts holes from overlapping areas? This is merely a dramatic
example of that—each time an ellipse was on top of another, a hole
was created.
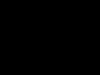
Because this is all one object, you can easily experiment with different
fill patterns, and the place to go for that would be the Interactive Fill
tool from the toolbox (the one that looks like a paint bucket with paint
pouring out). It provides access to each fill type that DRAW offers and
all of the common controls. Going from a flat color to a gradient color
(one that gradually changes from one to the next) is easy, as shown below.
And applying a more exotic fill from Corel’s Texture or Bitmap libraries
is also easy.

In all cases, the fill pattern displays where a closed shape is present,
but disappears in the hollow areas where the Combine command cut holes
in the shapes. You’ll find this 30-second masterpiece as Cool
Circles.cdr on the companion Web page for this book on the Sybex
Web site, www.sybex.com.
|
|
)
)
)
)
)
)