| |
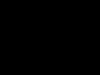
FIGURE
34.8 Functions and commands that used to require
many clicks are now just an Alt+S away.
- Snap to All and None We regularly want to ensure that all snaps
are on or off. These commands exist; Corel chose not to place them on
the View menu with the other snap toggles.
- Select All Text This is the easiest way to accomplish this.
The alternative is Edit Ø Select
All Ø Text. That’s too many
mouse clicks.
- Treat As Filled There is an icon for this on one of the property
bars, but it is so far to the right as to be cut off at many display
resolutions. We kept forgetting it was there, so we added it to our
Special menu.
- Special Effects The next three items ease access to the tools
in the toolbox that we invoke frequently, but are nested in flyouts.
And we still like to work “un-interactively” at times with
effects, so we were delighted to find that little jewel that opens whatever
docker is relevant to the currently selected object.
- PowerClip Now We see this as the prototypical candidate for
improved access, the alternative being Effects Ø
PowerClip Ø Place inside Container.
Frankly, the best way to treat this command is with a hotkey, so stay
tuned.
- Convert to Grayscale We convert more images to grayscale than
any other color depth, so it made sense to promote this command to one-click
access.
- Text Commands We’ll bet that most of you didn’t know
that the first two commands of this section existed. Sure, you can dial
up any spacing value you want in the Format Text dialog, but these are
different—they automatically set spacing to 150% or 200%, figuring
out for themselves what that would be, based on type size. These are
two of the many commands hiding in the Customize treasure trove.
- Photos and Clipart These are the two Scrapbook dockers that
we use most often.
- Drop Shadow Finally, you won’t find this command anywhere
on your system. It is a script that we wrote for applying a simple drop
shadow behind a selected object. Once we saved it as a script file,
DRAW made it available for inclusion on any toolbar or menu.
In all of these cases, our chief criterion is obvious: which commands
and functions require that we click through multiple menus, flyouts, or
dialogs? As far as we’re concerned, any command that is nested in
a flyout (meaning we would have to click three times, and possibly click
and hold for one of them) had better be an item that we don’t use
often. If we need it regularly, it gets promoted.
|
|
|

| TIP We have focused on customizing
the main menu, but DRAW has other menus. Examine the drop-down list
in Customize Ø Menus and you will
find every context menu that DRAW offers (the one that appears when
you right-click an object). One valuable customization strategy is
simply to place the commands you use most often at the tops of each
context menu.
|
The Keys to Happiness
Those who want to drive the CorelDRAW interface as fast as they can will
look no further than their keyboards. We decline to debate which method
is best—icons, menus, or keystrokes—as it is based on personal
preference. But for pure speed, keystrokes will win all the time, and
we’ll challenge anyone to a race to prove it. Keyboard users have
yearned for Corel to provide more hotkeys, even if the developers have
to use strange and bizarre ones (such as Alt+F3 for Lens and Ctrl+Shift+A
for Copy Properties From). But you no longer have to accept weird key
mnemonics or absent hotkeys. From Customize Ø
Keyboard, you have total control.
Assigning and reassigning shortcut keys follows the same path as toolbars
and menus: you get a list of every single command in DRAW-land, and then
a box to type the shortcut key you want applied to the chosen command.
If you choose a keystroke that is already in use, you must click Delete
Conflicts in order to continue, and once you do, you then have the option
to Navigate to Conflict—meaning DRAW gives you a chance to assign
a new keystroke to the command that just lost its original one.
There are two distinct sets of shortcuts—text editing and everything
else—and the View All button takes you to a dialog displaying every
shortcut key in service, with options to print the list or export it to
a file.
The one shortcut key that we think has saved us the most time is our
Auto-PowerClip key. Here is how we created it.
- 1. From Customize Ø
Shortcut Keys, we drilled down to Effects Ø
PowerClip Effects Ø Place Inside...
- 2. In the Press New Shortcut Key box, we typed Ctrl+1.
We did not have to deal with Delete Conflicts because no other command
or function uses this keystroke. (In fact, we found that Ctrl+1 through
Ctrl+0 are excellent places to store custom shortcut keys.)
- 3. We clicked Assign and then OK.
The reason we like this shortcut so much is that it allows us to operate
with maximum efficiency and minimum effort. Imagine that you’re about
to powerclip one object into another—the final action to be taken
is a click with your mouse on an object on the page. That’s non-negotiable;
there is no way to do that without using the mouse. Even if you know the
cool shortcut of right-dragging one object atop another, it’s still
a mouse-centric operation. So the last thing you want to have to do is
traverse off the page to the menus to do a bunch of clicking, only to
have to return to the page to click on the container. With the hotkey,
it is so much simpler:
- 1. Select the object to powerclip.
- 2. Move your cursor to the desired container.
- 3. Press Ctrl+1 and click.
That’s it—you’re done. Couldn’t be simpler.
|
Hotkeys for Your Hot Tools
By now it is self-evident, but it is worth reiterating: all of
the icons in the toolbox can be given shortcuts. You can create
a keystroke for the Bézier tool, the Knife tool, or the Slanted
Dimension tool, and for any particular fill type, such as Texture
or PostScript. Even No Fill can be customized, which would otherwise
require a trip to the × on the color palette.
We wasted little time swapping Uniform Fill with Fountain Fill—we
have never understood why the busier Uniform Fill requires Shift+F11,
while the more exotic Fountain Fill only needs F11.
You might also be interested to know that all of the node-editing
commands are assignable, such as Join, Break, Smooth, Cusp, and
so on.
|
Managing Workspaces
If you have followed along with this chapter, you have created a workspace
to store all of your interface design changes, and perhaps thought of
more than one workspace you can create:
- • Is your computer shared among multiple users?
Each can have a workspace.
- • Do you have separate projects with radically
different needs? Make workspaces for them.
- • Do you routinely change screen resolutions?
Make a workspace that is better suited for lower resolutions.
|
|
)
)
)